
When you enter the ICT suite with your students, do you get bombarded with the question Can I work with so and so today? Or find yourself faced with the aftermath of mass login, where children have forgotten what to do next. As a classroom teacher I know that establishing routines and consolidating these is essential, and so have a set of Network Room routines to help me organise and manage teaching and learning within this oft times seemingly chaotic environment.
Routine Number One:I have a seating plan for the suite. Children are organised into pairs, and since literacy is still an essential part of many ICT activities, each pair has a more able reader.

All our workstations are numbered, little laminated cards are attached to the tops of the monitors. In addition each numbered card also has a clipart image inserted. This way younger children can identify their machine with the train, aeroplane or elephant on it as well as by workstation number. The addition of the clipart image is something I borrowed from foundation colleagues, who usually label coat hooks and lockers with a child's first name and a picture, to enable their emergent readers to identify which hook or locker is theirs.
Sometimes a partner is away from school, and children ask if they can work with someone else. My answer to this question is always no, as the children have the rare opportunity to have access to fly a machine solo. This also means I can monitor or evaluate what they know and that they are doing, and not sitting back. I offer this reason to the students, though organisationally there is also a good reason for this, as it reduces confusion when their partners return, about who they are working with and this also reduces confusion about files and work that is ongoing. Allocating machines, also means that if there are network problems, we can always save files locally to be copied back to network folders later, and there are fewer problems in finding a student's file.
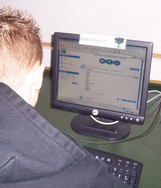
Routine Two.On entry to the suite, we have a two minute log in challenge. Children go to their machine and log on straight away before coming together for the lesson proper so to speak. Once their workstation has begun to load, we come together as a class in the shared space at the front of the online classroom, network room or ICT suite however you refer to this space, ready to begin the lesson. I have also begun to encourage children who get back to the shared space first, to log on the teacher machine attached to the IWB in our classroom's shared space using their class log in, this has encouraged children to increase the pace of the challenge activity, and means we have access to everyones files for sharing, either at the end of the session or during the introduction. The activities for the day are introduced through a shared session, and then children go in pairs to their allocated workstations. I have found this really beneficial, as the time lapse between going to stations and then logging on, particularly in the case of some of my younger students means they have forgotten what they must do next, and which software tool they are going to use. In the early stages of a unit of work and sometimes with younger students I also, go through the log in routine and then an additional load software stage as two separate activities within the shared session, before the teaching activity is introduced. In this way the students are developing independence in locating tools, and the idea of getting set up, before we begin using the software environment as a learning environment.
Routine Three: Ending the SessionTo some it may be considered a bit of a waste of time to tidy up between every session, but I strongly disagree with this viewpoint, and believe that one of the key elements in developing independence as a learner, is the ability to organise your own learning space. Tidying up is not about leaving a lovely looking room, to me, it is about organising yourself and time spent teaching and consolidating this as part of classroom routines early on in a year has enormous benefits later. In the ICT suite or Online Classroom this is perhaps even more important because we share the expensive tools to be found here with other students and colleagues in the school. It is about establishing respect for the resources available to us. There is nothing more annoying, frustrating or disheartening for colleagues and students alike to have to clear space, and tidy up before they can begin work. It is also diruptive to established routines with your class. If we consider Online classrooms as different to our own, we are in danger of seeing ICT as a time to play on the computer and not a time to learn new skills to help us in our own classroom learning. So Endeth the sermon, and climbing down from my soap box!... at the end of every session, All Users in our Suite are required to
- Close down all programs
- Log off their machine
- Clear away any tools they have been using in addition to the computer, eg paper and pencils, text books, or small dry wipe boards and pens.
- Recycle scrap paper
- Tuck in chairs or stools
- Turn off monitors
- Return to the suite's shared space for review and discussion
It is time consuming in the early stages, but many of my students now remind and go through my routines with me at the end of a session. They are repetitions of their own, with the addition of putting the digital projector on standby. We are role models for our students, but as learners we too can forget sometimes (usually on purpose I hope), it helps the students develop a shared sense of responsibility for ours and their learning, and the tools available if we encourage this type of intervention and support from them.
Projector bulbs are very expensive consumable items, and their lifetime can be extended by turning them off when not in use. Schools are preparations for life beyond, and many of the routines above are essential prerequisites of using ICT in the workplace. Logging off, is in the real world a network security and data protection issue, as well as good network practice.
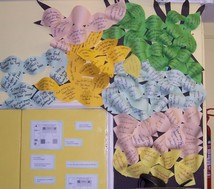
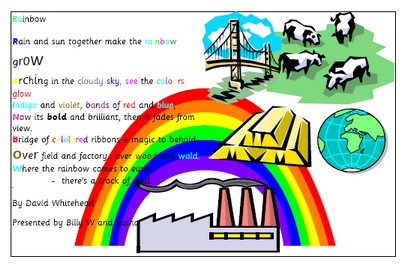 During the following sessions, the wordprocessed text was revisited, and ideas children had used were shared. This is one of the joys of a network and access to an IWB, all ongoing work is accessible for sharing and evaluation by a wider audience. The completed texts were copied and pasted to Microsoft Publisher, where it became part of a designed poetry book page. The students searched the clipart gallery and inserted images to reflect the content of the poem. These were dragged around and placed to suit their ideas. Sometimes as page backgrounds, and sometimes as illustrations. Working with the poem in this way really challenged their comprehension skills, as well as engaging them in learning those ICT skills necesary to complete their project, and which I had set out to teach and consolidate. We have published our acrostics as a class book, and despite beginning with the same file each poem is far from identical. The different text styles, graphic elements and spacial qualities of each page make all individual, and in themselves are discussion points about how visual resources can be used to create and change the meanings we present.
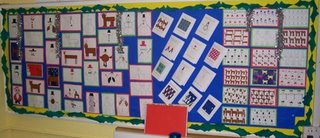


