We used available non fiction texts and Scheme materials including secondary and primary source material to support the information gathering process, and began exploring through the use of images, talk for writing and role play, how it might have been to be a slave of Victor's age. From the information we had available, comparing this with our own lives as we tried to develop empathy with our central character. The text presented in the flash presentation below was developed over the course of our writing unit, during guided and modelled composition activities. It was originally part of a PowerPoint story, including hyperlinks to lead us off to the stop and think areas, that were developed, we hoped, to engage our readers with the story in a different way. Adding depth to the engagement our readers would have, by asking them to explore aspects of the story we had written more deeply, and doing things in response to our writing.
Using 2Create to Add a New Dimension to an Existing Idea
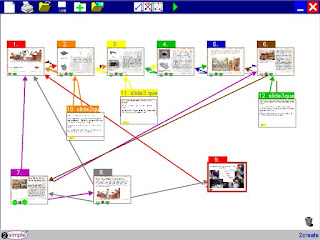 This morning I have been playing with 2create, by 2 simple, and as I mentioned in my previous post, this tool has the ability to export, what is in this case a mirror of the powerpoint show we originally created as a class, in a flash format. To create the basis of this presentation, I opened 2 create and inserting the same number of slides as I had in the original PowerPoint show. Toggling between PowerPoint and 2Create I copied the content of each slide from PowerPoint to its corresponding slide in 2Create.
Bringing the Show To Life
Adding Common Navigation Structures to the Show
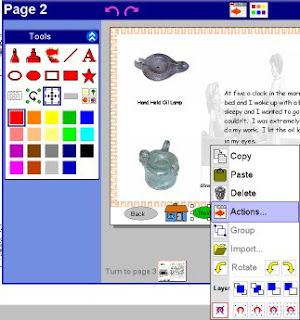 With the content in place, I then added a series of common buttons for navigation.
- A back button - to take us to the previous slide
- A next button - to take us to the next slide in the story
- A home button - the house, to return us to the first slide in the show
- A thought bubble button - to take us to one of the stop and think or explore pages.
For ease of development, I made one full set of buttons opn the first page, and then selected, copied and pasted these to each of the slides in my 2create presentation.
It is important to emphasise to students why common navigation structures are neccesary in texts such as this which have strong parallels and models in the web sites we visit. The navigation structures help our readers understand how the text we have and are creating is intended to work. Readers need this in order to help them engage with our work in the way we intended. Good Authors of course take their readers into account when they are writing. Not all student shows need to have the same navigation tools or symbols, but within each show or text the navigation style should be consistent.
Linking the Pages in the show
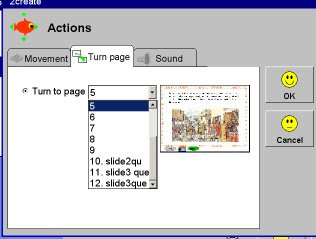
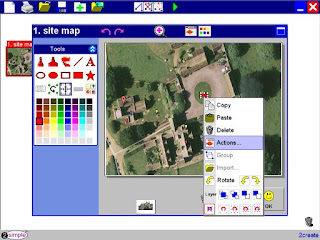
With the navigation buttons in place, hyperlinks can be added between slides, allowing readers to turn or move from one page to another. In 2create this is done, by
- Clicking on the button or object we want to use as our link
- Right clicking to reveal a context menu for that object.
- Clicking the actions tool,
- In the "actions" dialogue box. Clicking the "turn page" tab,
- Selecting from the drop down menu the page we want to link to, before pressing the ok button.
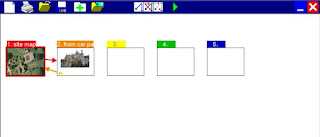
 When working with the students on our mapping project they were required to give each page or slide a name, so they could see at a glance where their buttons were leading to. You may find this process useful too if you decide to play with this tool. This process was repeated with each button throughout the show, with buttons not required on certain slides being deleted as I went.
Testing the Show
This may seem obvious but when building or compiling anything with Hyperlinks in I always try them out locally or through preview, to make sure they lead to where I want before I publish. Pressing the green play button in 2 create, compiles a flash file to run in the program, so the look, feel and navigation of the project can be trialled and evaluated before being published. Working on our mapping project the students have been encouraged to engage with this process continuously as their atlases were being developed, it has a kind of a DT feel to it, but in projects such as this we are not just learning ICT skills we are creating content and authoring textual spaces that we want our readers to engage with. There is nothing more frustrating than engaging with an online text and then hitting a dead link. It is advisable therefore to spend time working through the text you have created or encouraging the students to spend time playing in their own texts before publication.
Publishing the Show
Using 2create, the slide show can be saved in the software's native format (.2cr), but also exported as a "Flash File." (.swf). Flash Files, are a web standard format, many of the websites we visit everyday use flash, BBC Bitesize interactivities are flash files, and the navigation panel in "Espresso" for example is flash based. Flash files can be added to the school website, and as you can see here to a blog so visitors can engage interactively with the work we or our students have developed through 2create. In order to have the file run, it must be uploaded to a web host in the first instance, this file has been uploaded to the file storage space on my web site and then linked to the blog through a piece of code I borrowed from "Flash For Blogger -Dummies Guide."
The SmartBoard's Notebook, is also enabled to allow the inclusion and use of flash based interactivities. So the files developed in 2create can become additional multimodal resources for use on the IWB.
Slideshow Credits: Original Story by SMills and Y4 (2004) Teyfant Community School, Redeveloped by SMills in 2create 2008



 This week I downloaded, installed and had a little time to play with the


